Bottleneck Control
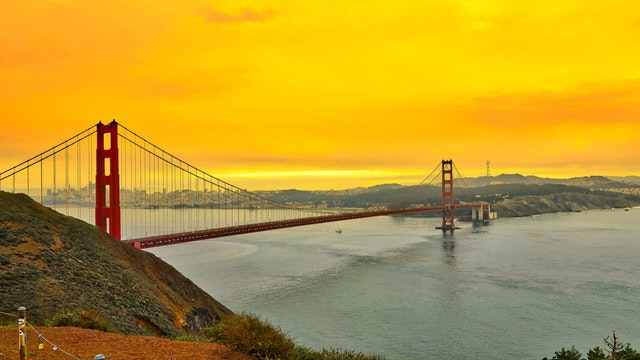
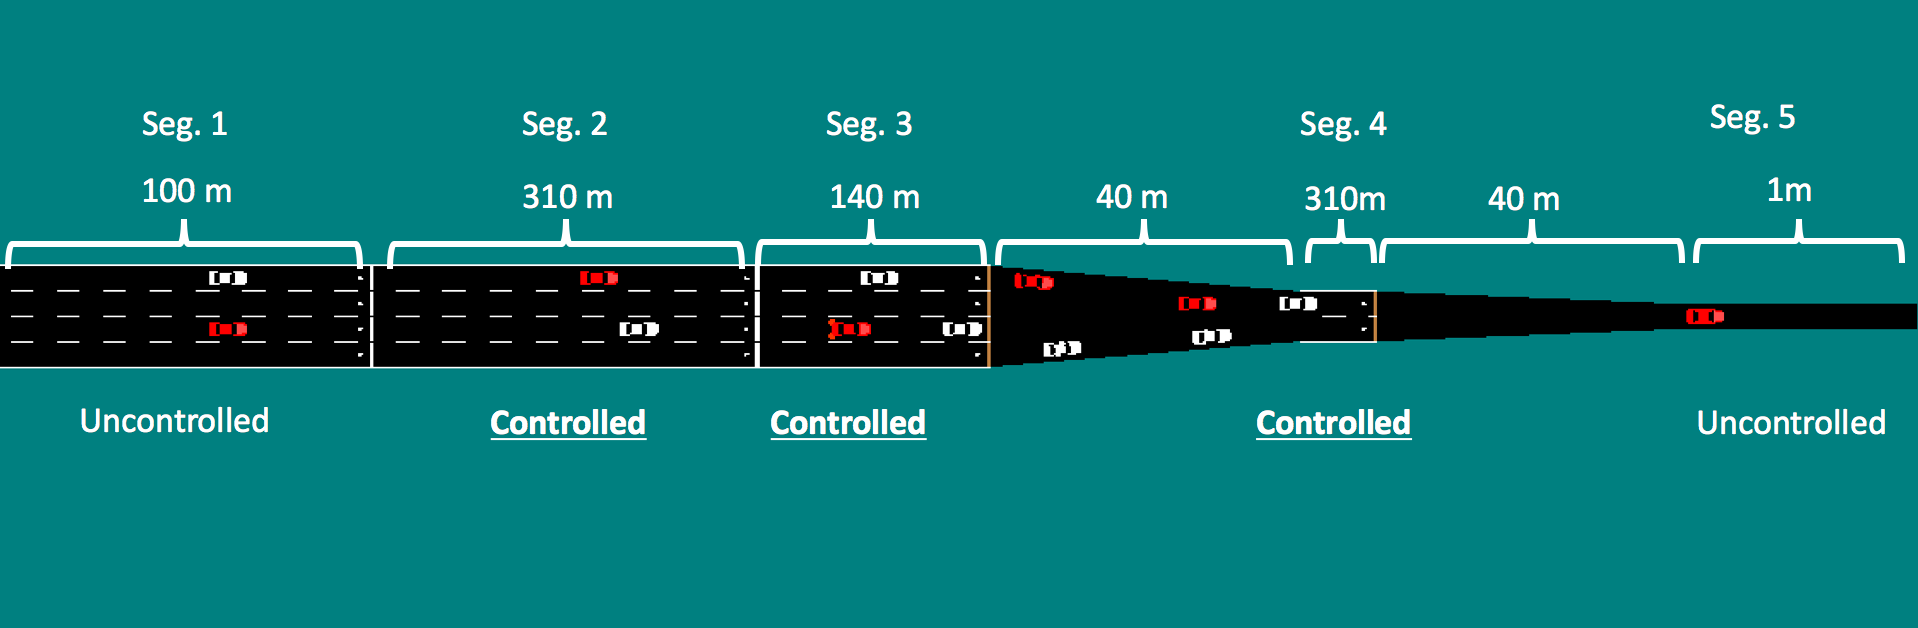
Inspired by the rapid decrease in lanes on the San Francisco-Oakland Bay Bridge, we study a bottleneck, depicted in Fig. 1 that merges from four lanes down to two to one. We come up with a scheme that could save on the costs of deploying traffic light infrastructure by relying on freely available autonomous vehicles.
In this system, too large of an inflow into the system leads to irreversible congestion. We demonstrate that we can increase the total flow rate of this system by using AVs. The AVs are able to learn a strategy similar to a traffic light, deciding which lanes go and whch stop. This increases the effective outflow at high inflows, and performs competitively with ramp metering, the solution that is currently deployed on the Bay Bridge.
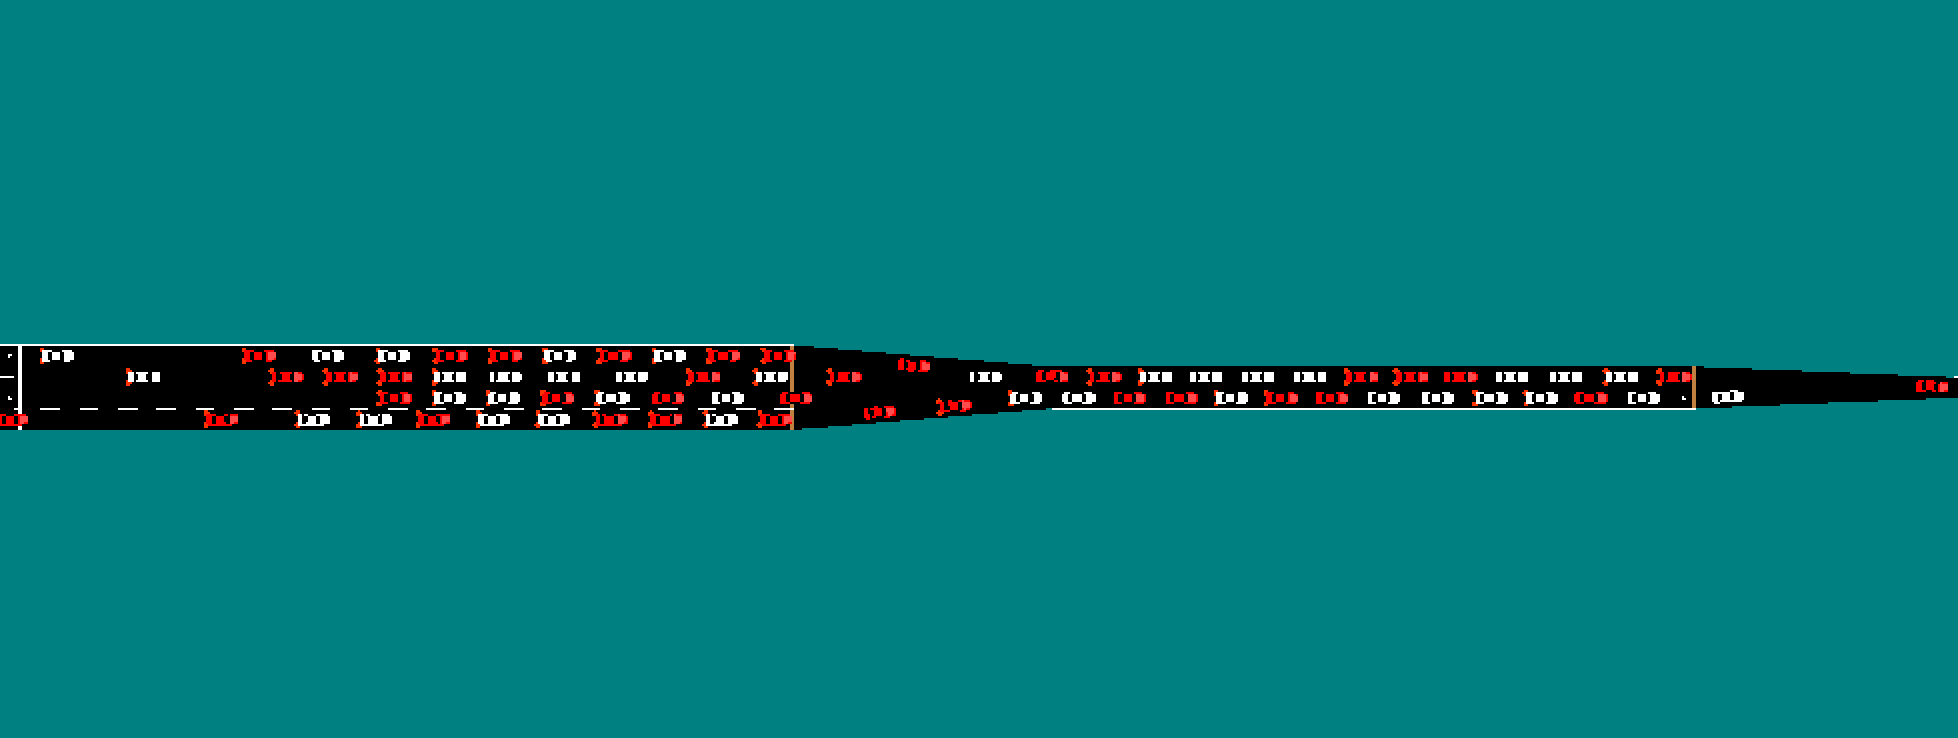
In the video below, we depict the effects of this congestion.
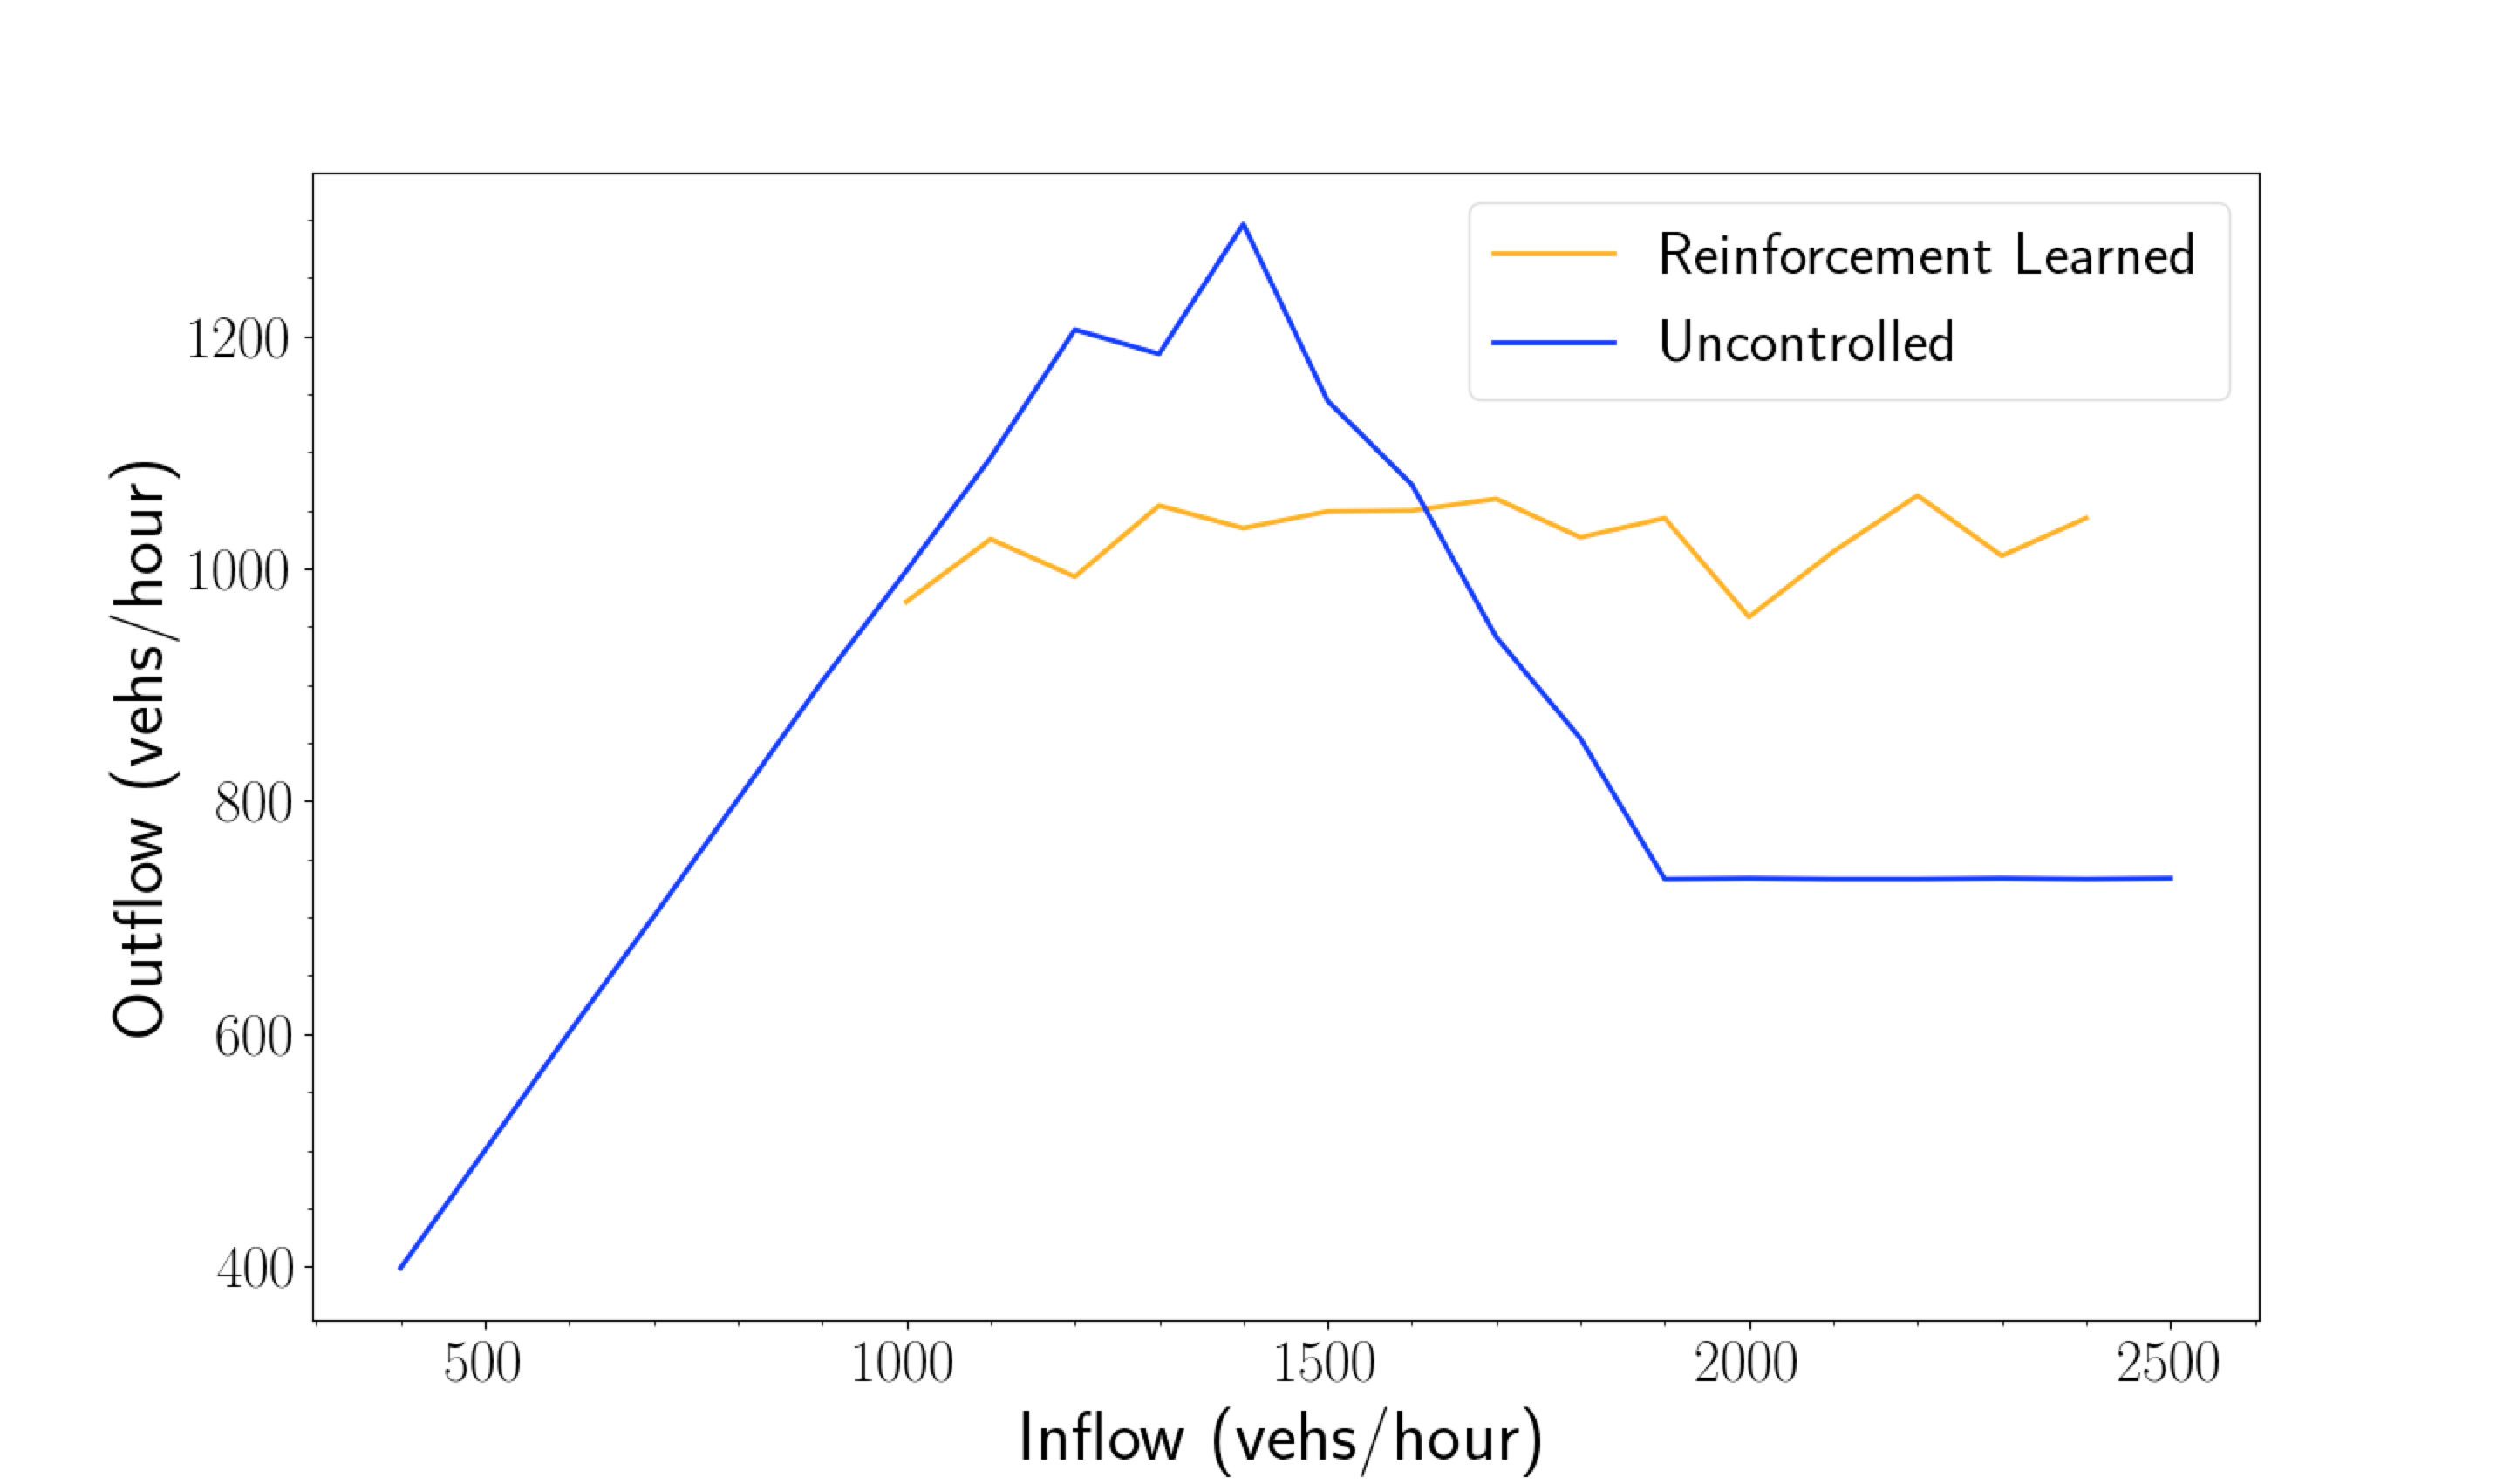
The effects of congestion can be visualized in the following graphic, where we plot the number of entering vehicles per hour vs. the number of exiting vehicles per hour. As can be seen, the exiting number gradually increases but then sharply dips down.
Now we convert 10% of the vehicles to AVs and let them choose their accelerations and actions. As you can see in the attached video,
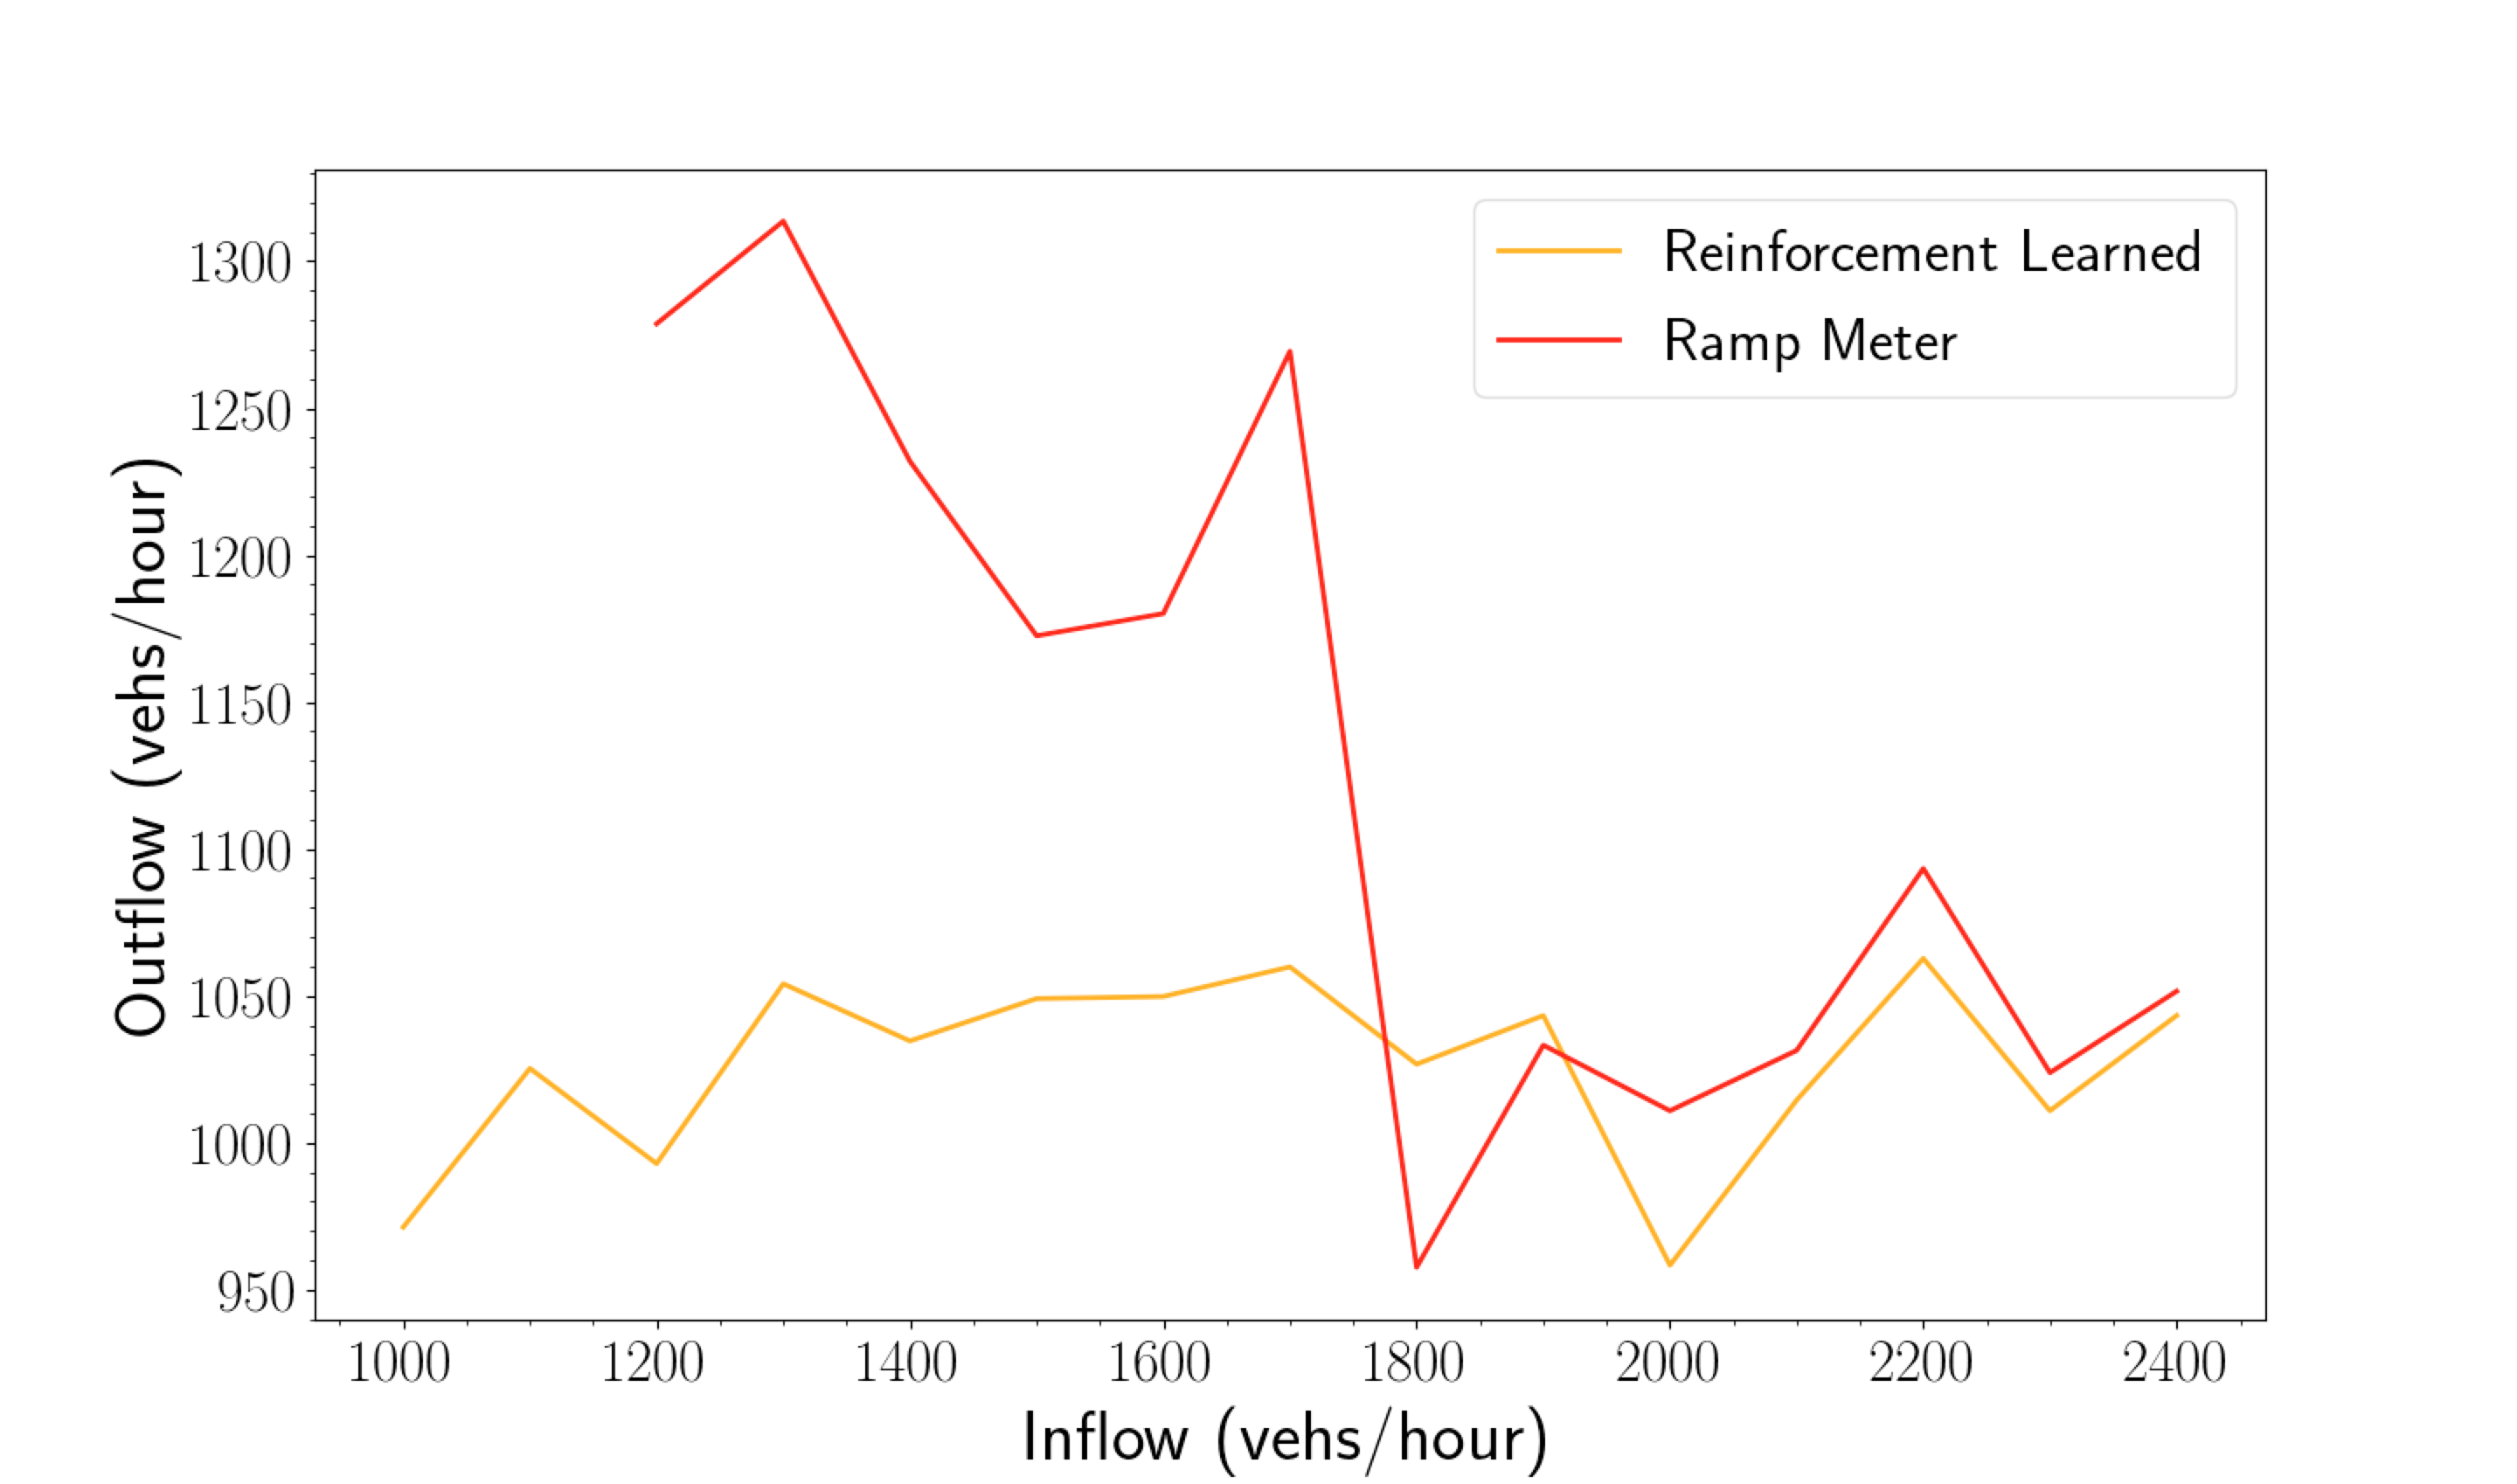
Now we compare the entering vehicles/exiting vehicles curves with and without autonomous vehicles. The curves with 10% autonomous vehicles is depicted in yellow and the 0% autonomous vehicles i.e. the fully human case, is depicted in blue. At high inflows, we see a 25% improvement in the outflow.
For purposes of curiosity, we compare this with a ramp metering strategy in which we add a set of traffic lights at the entrance to the bottleneck. This is the currently deployed control strategy on the Bay Bridge. We see that the two perform comparably at high numbers of entering vehicles, but the traffic lights outperform at low inflows. However, in this low-inflow regime we would not actually apply control as this is before congestion sets in. Thus, we claim that the two schemes perform comparably.